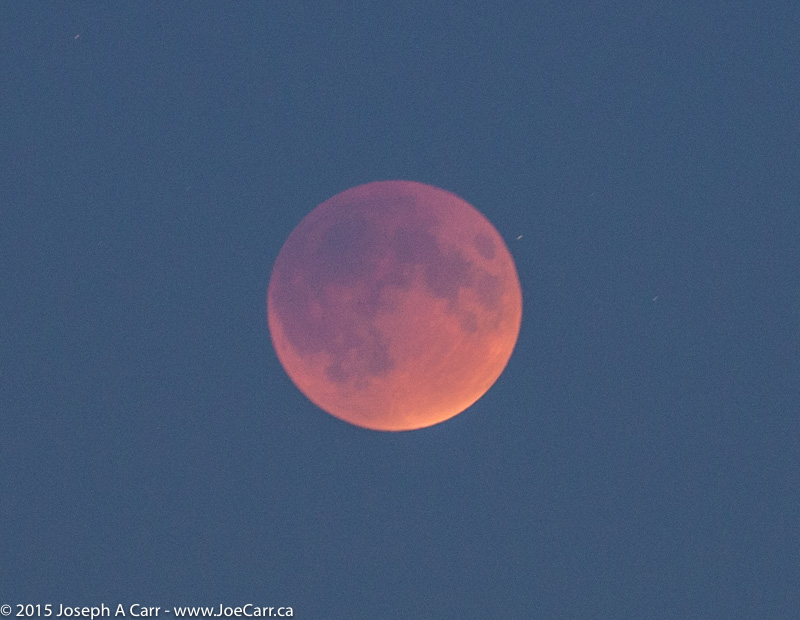
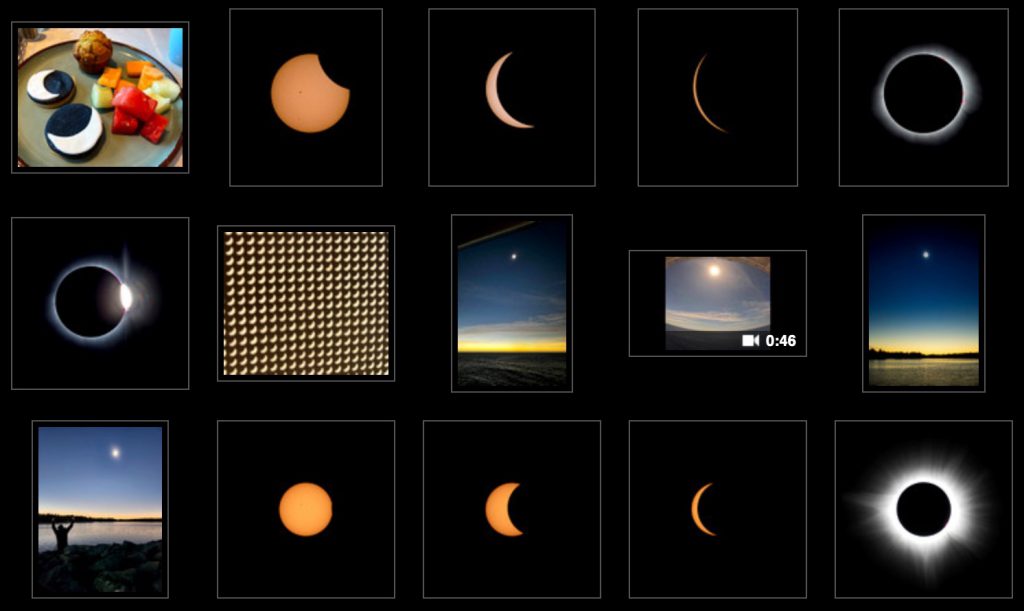
Eclipse Photos by members
Reports from our members
Southern Ontario – Chris Gainor – blog

“…we drove south from Windsor through Amherstberg into the path of totality. Many eclipse chasers in the area were already arriving in Point Pelee Park…we found a great spot to watch the eclipse at Colchester Harbour and Beach. The Windsor Centre of the Royal Astronomical Society of Canada (RASC) had set up tents and telescopes there, a restaurant, coffee shop and other facilities were nearby, and scores of people were already settling in to watch the eclipse over Lake Erie.”
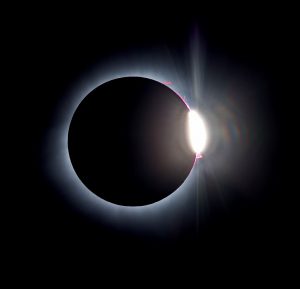
“…Finally, at about 3:12 p.m., totality began. We were amongst the first to see totality that day from Canadian soil. The transition from needing eclipse glasses to full totality with the naked eye seemed to be prolonged to me, but finally we got our 90 seconds of totality and dark skies. Venus was plainly visible through the thin layer of cloud…”
Offshore from Mazatlan, Mexico – Joe Carr – photos
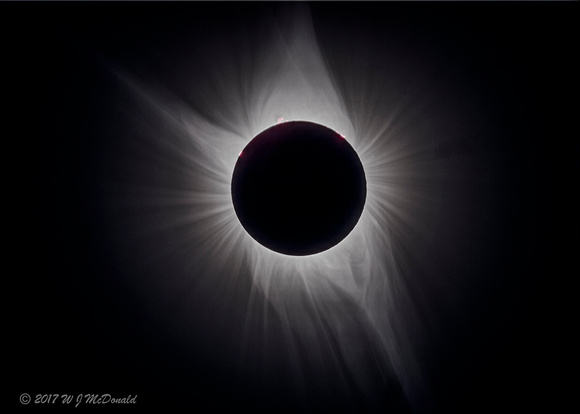
I observed my fifth Total Solar Eclipse from the Discovery Princess cruise ship, 150 nmi SW of Mazatlan. We had near-perfect skies thanks to the superb skills of the bridge officers, and my balcony faced south as the ship tracked the path of totality at the appointed time under the Moon’s shadow, making observing and photographing this spectacle easy and comfortable.
During the 4.5 minutes of totality at 11am local time, both Venus and Jupiter were visible, and watching the shadow approach from the west and retreat eastward was a lovely sight. Every solar eclipse is unique – this apparition offered beautiful, large solar prominences either side of a breathtaking diamond ring as totality ended at C3. I measured a 10ºC temperature drop with my portable weather station as the eclipse progressed from C1 to C2 and C3.
My fellow Victoria Centre members John McDonald and Bill Weir were aboard the same ship as me, and Miles Waite was enjoying the same beautiful view while aboard the Ruby Princess, only a few miles away from us. We remembered the 2017 Total Solar Eclipse (and Diane Bell) at breakfast when the ship’s pastry chefs served eclipse cookies.
Original Eclipse Information – posted earlier
If you haven’t observed a Total Solar Eclipse, this is your chance!
A Total Solar Eclipse is a rare astronomical event (2017 was the last one), and it is even rarer for one to occur in locations that are easy to travel to. Although only a partial eclipse is observable from western Canada, the eclipse tracks diagonally across North America (southwest to northeast) on April 8, 2024. In fact, everyone in North America is within striking distance of being able to observe this amazing event, where the Moon slides in front of the Sun for a few brief minutes, suddenly and totally obscuring the Sun.
Location
The eclipse tracks diagonally across North America, starting in Mazatlan, Mexico, across Texas and other states in the middle of the USA, tracking across southern Ontario, Quebec and the Maritimes. Dedicated eclipse chasers are seeking the best prospects of clear skies by travelling to Mexico, but there are lots of Canadians planning to observe from locations near home, despite the chance of clear skies being poor at that time of year.
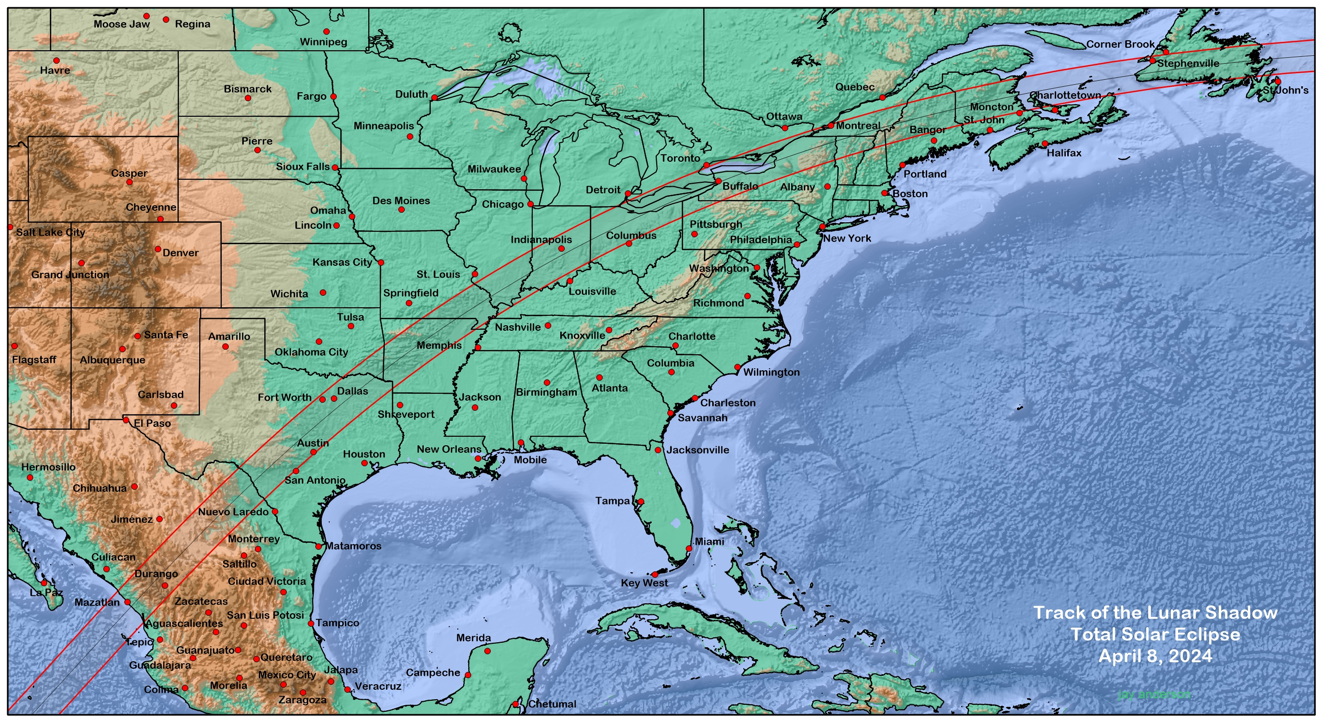
Time and Date’s 2024 Total Solar Eclipse site gives all the facts and figures required to find and enjoy the eclipse, including an interactive zoomable map showing the eclipse track and links to livestreams if you want to experience this eclipse from the comforts of home.
What if you can’t travel to the track of totality?
You can still see a partial solar eclipse from anywhere in North America. Use Time and Date’s interactive eclipse map to get the calculated timing for the eclipse in the area you plan to observe from. Click and zoom to your area, then click on your observing spot to see a popup telling you how long the eclipse will last and what you will see.
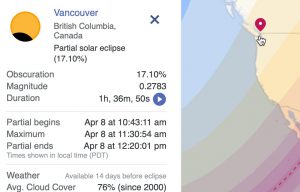
From our location in southwest BC in Canada, a small notch out of the solar disk will appear on eclipse day – obscuring about 17% of the Sun. Not exciting compared with the dramatic Total Solar Eclipse observed from the centreline, but still an interesting apparition to observe, assuming the 76% chance of cloud cover doesn’t prevail!
Weather
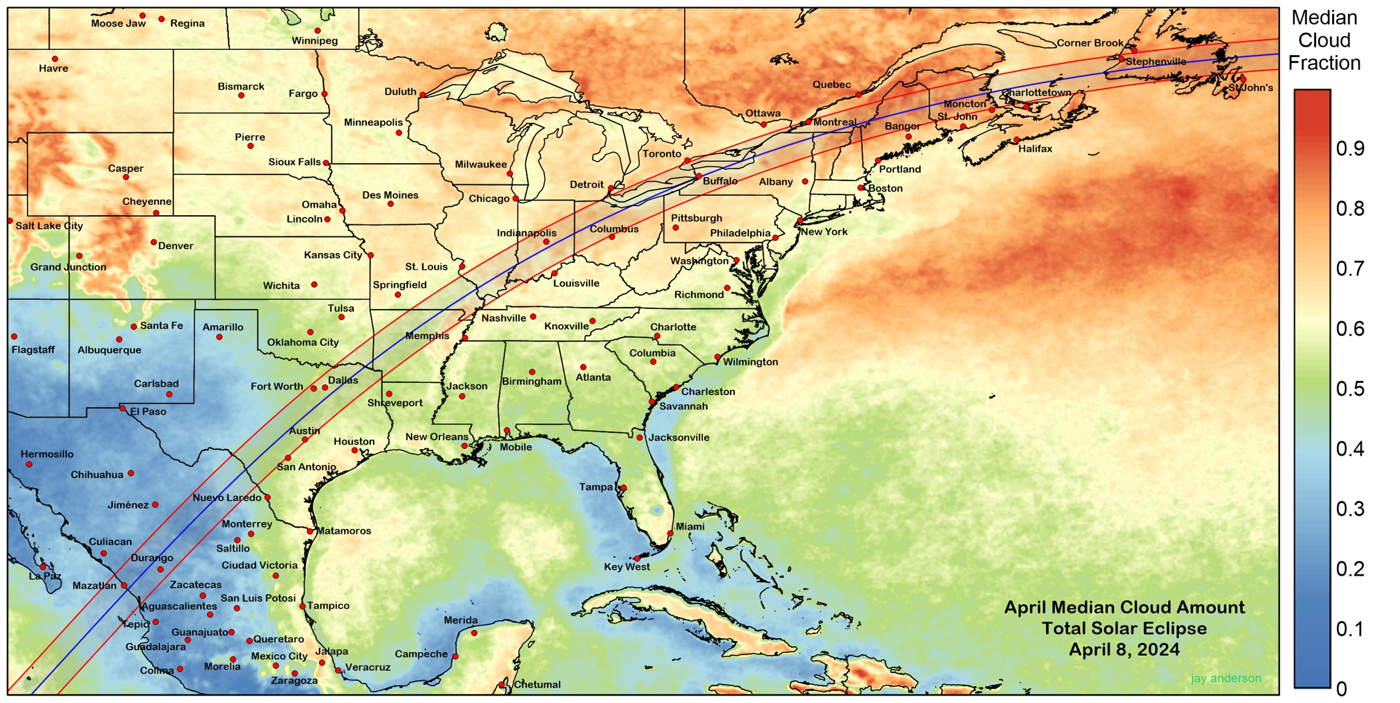
Weather always plays a big part in any solar eclipse, so being mobile is key to improving the odds of actually seeing the event should clouds threaten to obscure the Sun at the critical moment. Our very own Jay Anderson (former RASC Journal editor) is a weather expert, and specializes in forecasting weather for solar eclipses. His Eclipseophile website offers sage advice backed up with maps and charts depicting weather prospects for each eclipse happening in the world for the next several years. Read Jay’s analysis of the area you propose to observe from, so you understand how the weather might behave on eclipse day. Topography, elevation changes and local factors play into how the weather evolves throughout the day for a particular locale. Become a local weather expert, and you increase your chances for success!
Observing
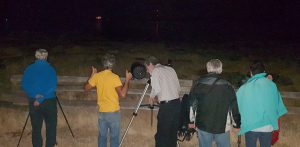
Observing a Total Solar Eclipse is pretty easy, however that said, if you haven’t done it before, it’s nice to have experienced eclipse observers around to help you get the most out of your time under the Moon’s shadow. Obviously the time of total eclipse is the main event, however other things happen beforehand, afterwards, and during an eclipse that are worthwhile.
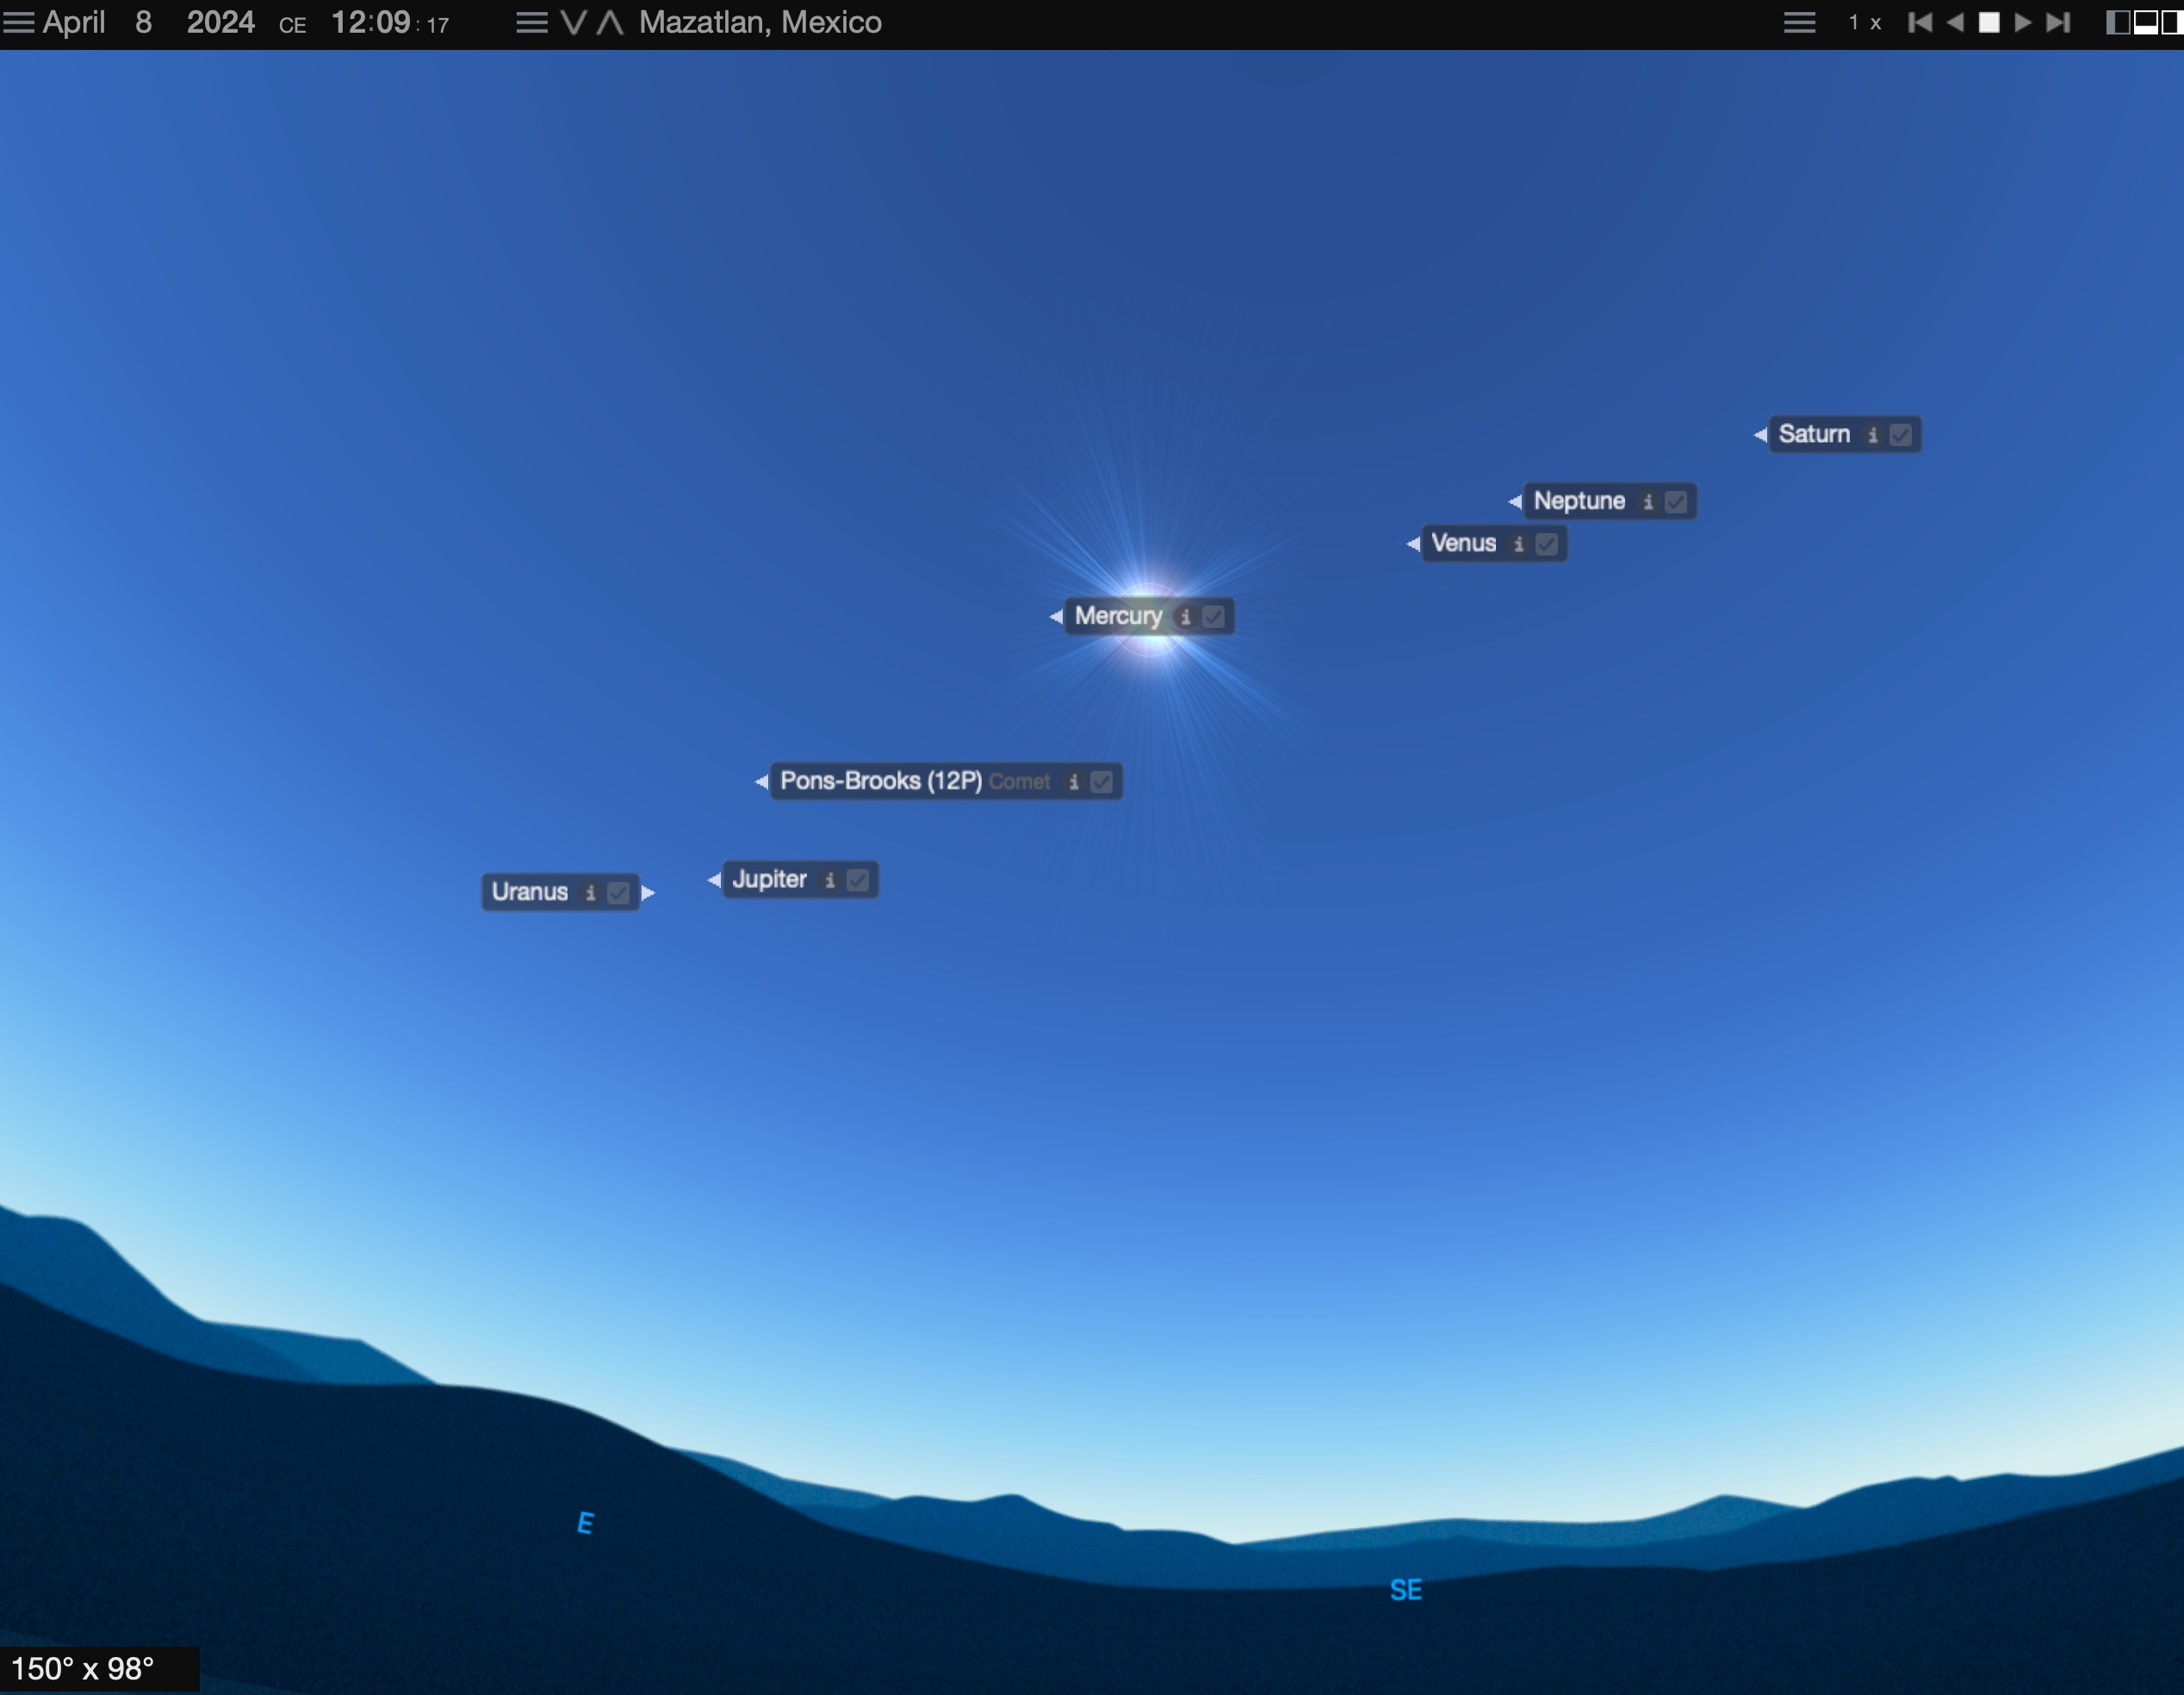
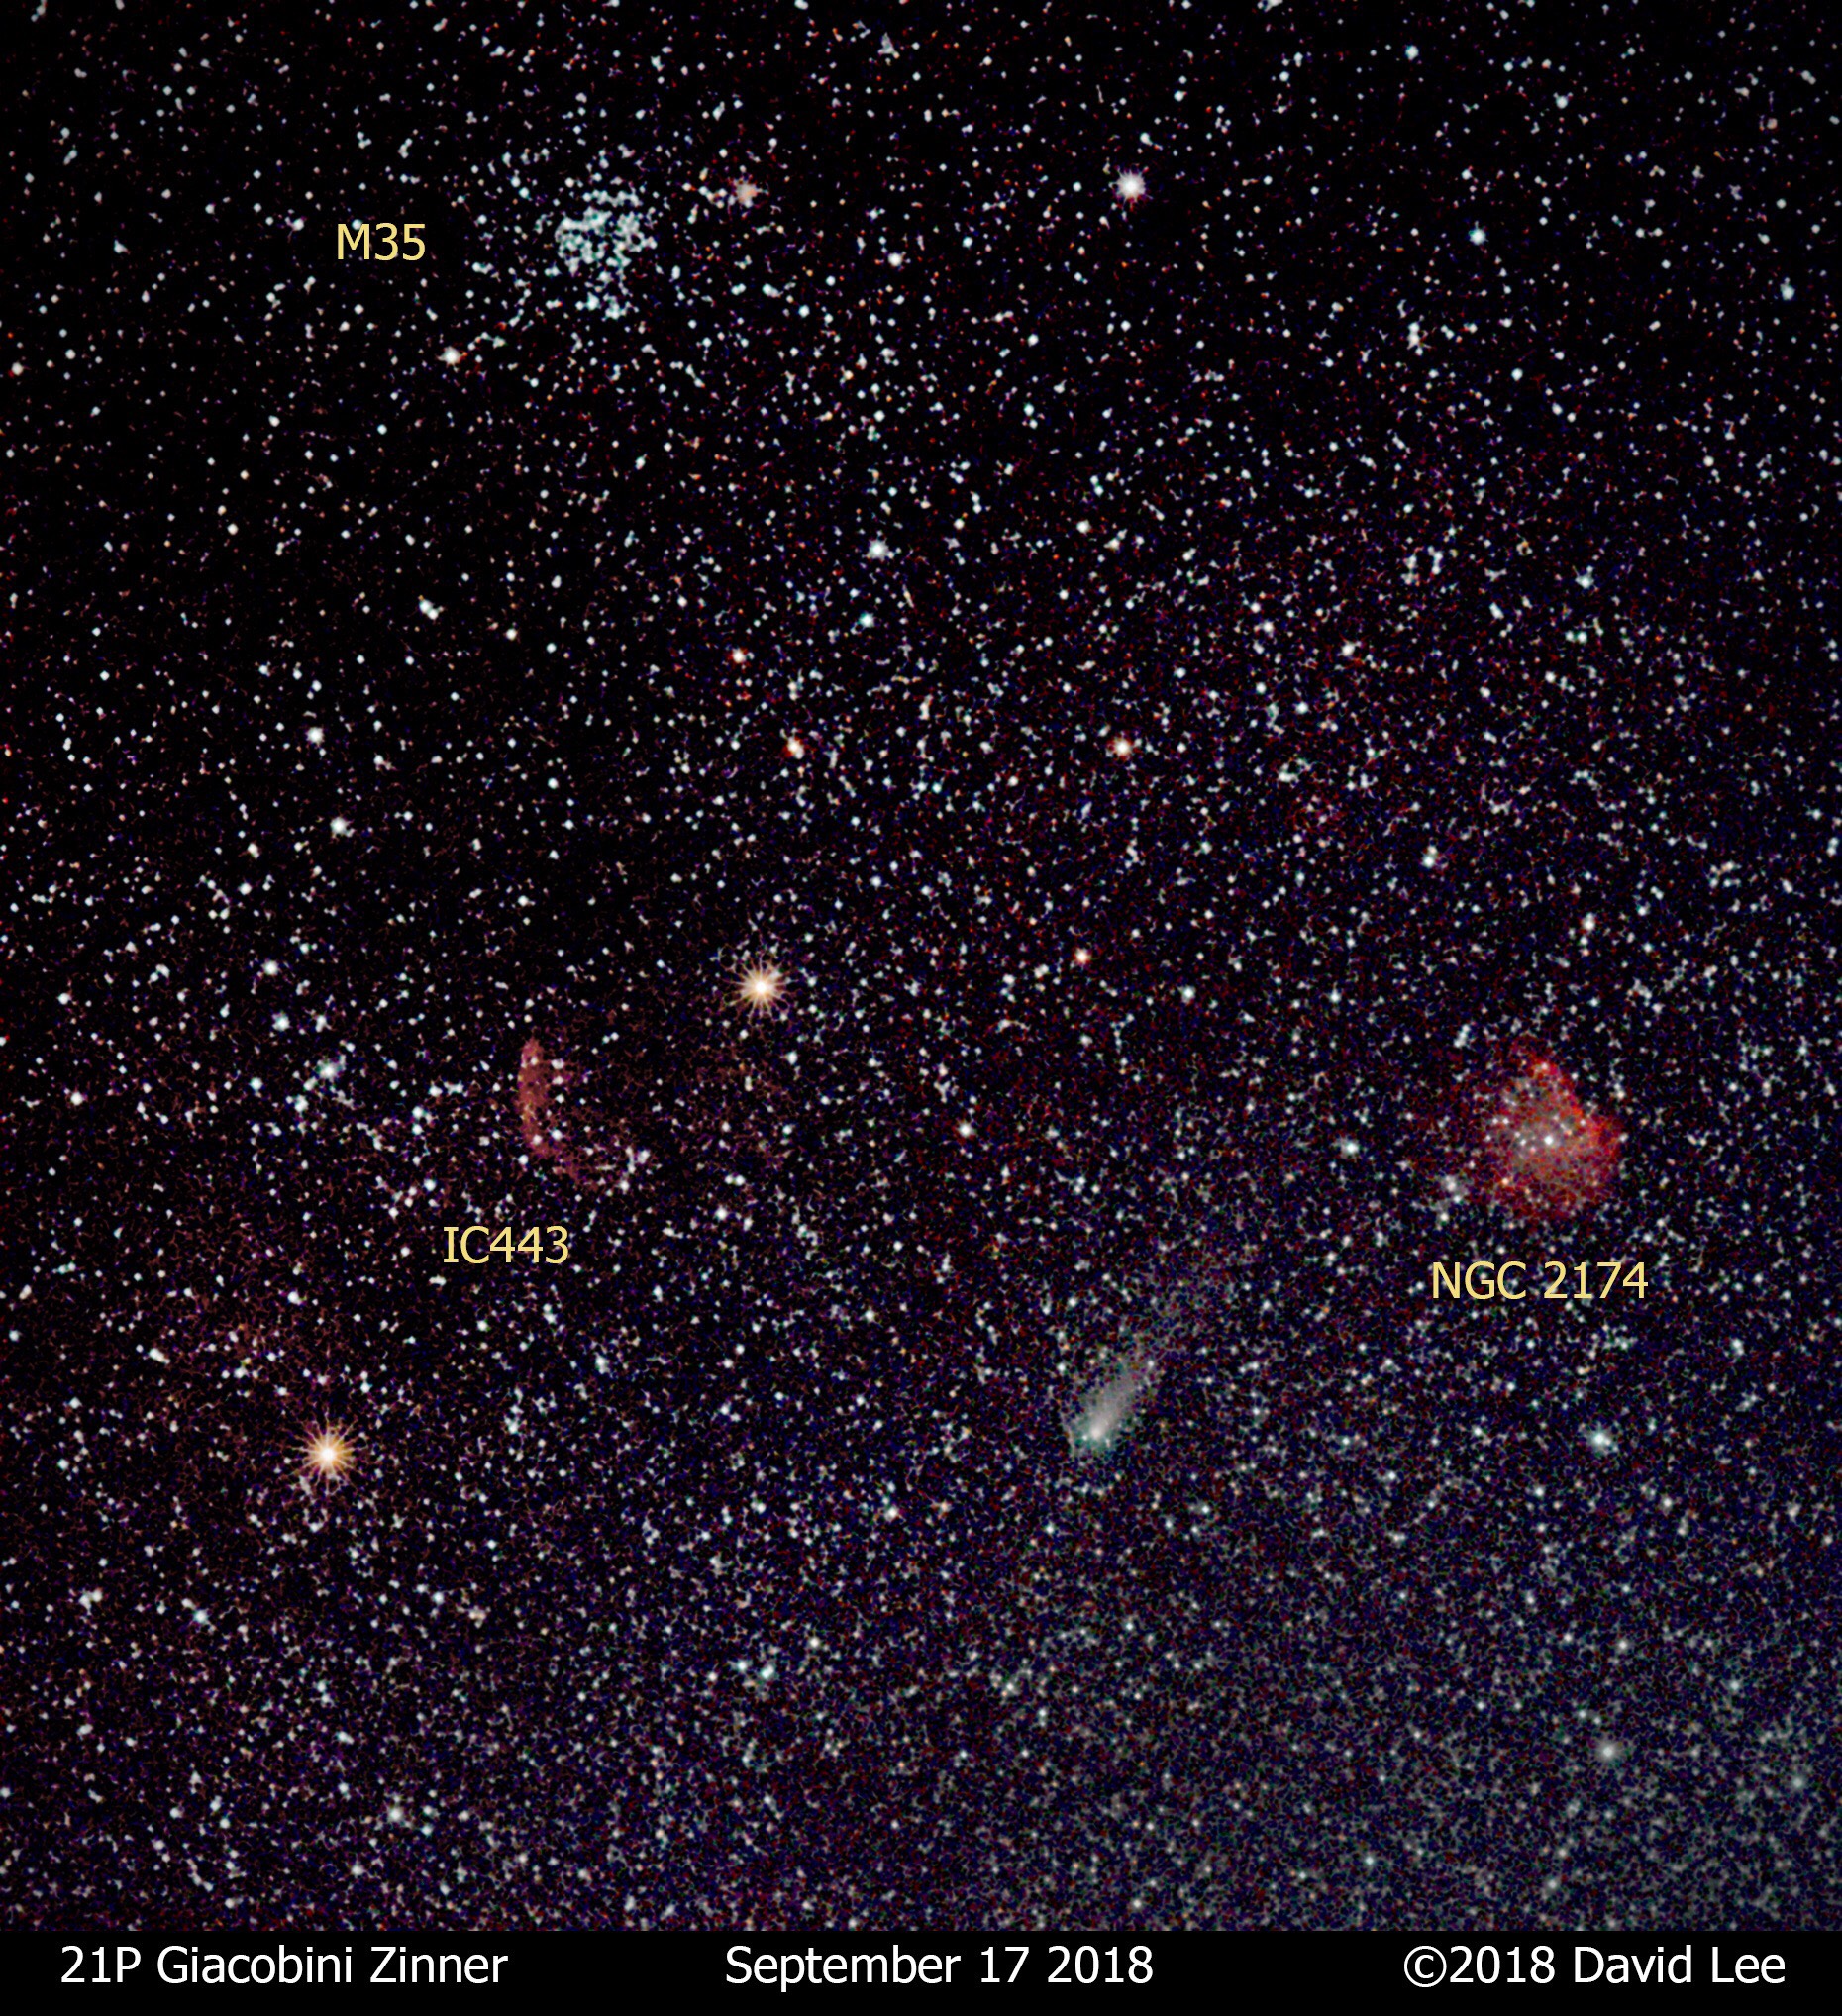
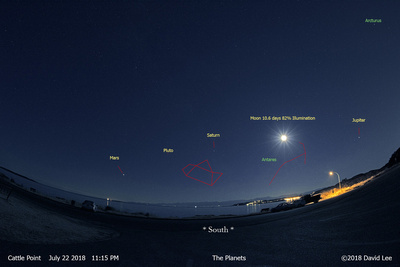
Although the eclipsed Sun is the main target, look around in the darkened sky for planets and other bright celestial objects. There is a good chance eclipse observers will be able to see: Uranus, Jupiter, Comet Pons-Brooks (12P), Mercury, Venus, Neptune and Saturn! Of course, the sky only darkens for the observer if they are in the path of totality, so anyone observing a partial eclipse won’t see any solar system bodies (except the Sun itself).
Be sure to try out any gear you propose to take with you before you leave. Make sure you have proper solar eclipse filters for any binoculars (or your eyes), camera lenses and telescopes you are bringing along. Remember, you only have a few minutes to see totality!
Finally, relax and enjoy the day. Arrive early. Try to manage your stress level. Just sit back in a reclining chair, have your solar glasses handy, and enjoy!
Safely observing a solar eclipse – read about how to safely observe a solar eclipse
DIY Box Pinhole Projector – to safely observe the eclipse with only a box and some aluminum foil!

Photography
If this is your first time experiencing a Total Solar Eclipse, don’t risk missing the eclipse by fiddling with cameras! Observing through (filtered) binoculars is a low risk way to capture the moments of totality in your memory.
For dedicated photographers, using their gear to capture a Total Solar Eclipse can be a right of passage, and has the potential to either be a highlight of your lifetime photography experience (if you succeed) or end up being a point of shame you never want to talk about again (if you fail). Take test photos of the Sun weeks beforehand, so you know your photo gear will work as expected. Always have a backup plan for when (not if) gear breaks, or you simply can’t get it to work properly. Here are some scenarios for consideration for those who are brave enough to want to multitask during totality – a once-in-a-lifetime event (least difficult listed first):
- Use a smart phone on automatic mode to take photos or videos of the scene around you
- Use a camera and wide angle lens mounted on a tripod to record the landscape, people and the eclipsed Sun (and perhaps stars and planets) in the sky. Take a random series of shots or set the camera to shoot automatically at regular intervals to create a time lapse series.
- Use a camera and moderate telephoto lens on a tripod to shoot video of the eclipse in the sky. Keep the telephoto lens short (80mm to perhaps 135mm) to let the eclipsed Sun pass through the frame.
- Use a camera and long telephoto lens on a tripod to shoot photographs of the eclipsed Sun. Take photos of the eclipse at the important moments: plasma streamers, Bailey’s Beads, Diamond Ring, totality, and partial eclipse phases.
- Use a telescope on a tracking mount with a camera on the back to capture closeup details of the eclipse events such as Bailey’s Beads and the Diamond Ring.
Expansion of the list above, with important details about setup, rehearsing, and special gear you may wish to consider purchasing can be found in this article: How to photograph a solar eclipse, with Alan Dyer – EarthSky.
Travel

Dedicated eclipse chasers and tour operators have made reservations at least two years ago at all the prime locations for this eclipse along the centreline where the weather is best. That’s not to say last-minute travellers are shut out from experiencing this eclipse – by planning carefully and compromising a bit, it can still work. Flights to hotspots like Mazatlan a couple of days before to a couple of days after April 8th will be fully booked, as will hotels and guest houses. Flying to nearby airports and staying in accommodation outside the centreline can make sense. Driving into the track of totality early on eclipse day can work for many who have not planned ahead.
Many of the USA states the eclipse track runs through will not have crowds of people once you are on country roads. With careful planning using the interactive eclipse and weather maps, it is certainly possible to observe the eclipse from the side of the road, parking lots, campsites, or farmer’s fields. Interstate highways which are in the track of totality will experience congestion, depending on how close to civilization the location is. When driving, expect long delays even for 24 hours or so after an eclipse as all those eclipse chasers try to get home! To avoid that anxiety, plan to stay a day or two longer near your observing site before commencing your road trip home.
Help!
If this will be your first time observing a total solar eclipse, no doubt you have many questions and concerns, and don’t know where to start. The resources presented here may be overwhelming. Please ask any questions you might have about eclipses at Astronomy Cafe, held each Monday evening by RASC Victoria Centre. Your fellow RASC members have observed solar eclipses before…they can help!
If you are reading this from other locations, find your local RASC Centre in eastern Canada which have posted eclipse events and information – Eclipse 2024 RASC.
Resources
- 2024 Total Solar Eclipse – Time and Date is a great starting point for information about this eclipse
- Eclipsophile – Jay Anderson’s weather predictions are a must to select a location that will give you the best chance clear weather
- Eclipse 2024 RASC – events and helpful information from RASC Centres in eastern Canada who are under the track of totality
- When to wear eclipse glasses and when to take them off – Dr. Rick Fienberg, American Astronomical Society
- Eclipse2024.org – comprehensive information about this specific eclipse – where to go and what you will see
- A Tour of the April 8, 2024 Total Solar Eclipse multimedia tour on eclipse day by Michael Zeiler from Sky & Telescope magazine in cooperation with the Kalamazoo Astronomical Society
- MrEclipse – Fred Espenak’s guide to successfully experiencing and photographing this eclipse
- Kendrick Astro – a Canadian astronomy dealer who sells solar filters for visual and photographic use
- 10 phenomena to see and photograph during April’s total solar eclipse – Jamie Carter on Space.com
- The ‘Devil comet’ will be visible during the 2024 total solar eclipse – Alison Klesman on Astronomy